Wall-mounted floating laptop desk
Design priorities:
- Comfortable standing height.
- Room for an external monitor behind my laptop.
- Not much extra room, to discourage clutter & piles of papers.
- Try to blend in to the living room, don’t make it look like an office.
- Let me “close up shop” at the end of the day and switch to a non-work mindset.
- Affordable and easy to build quickly.
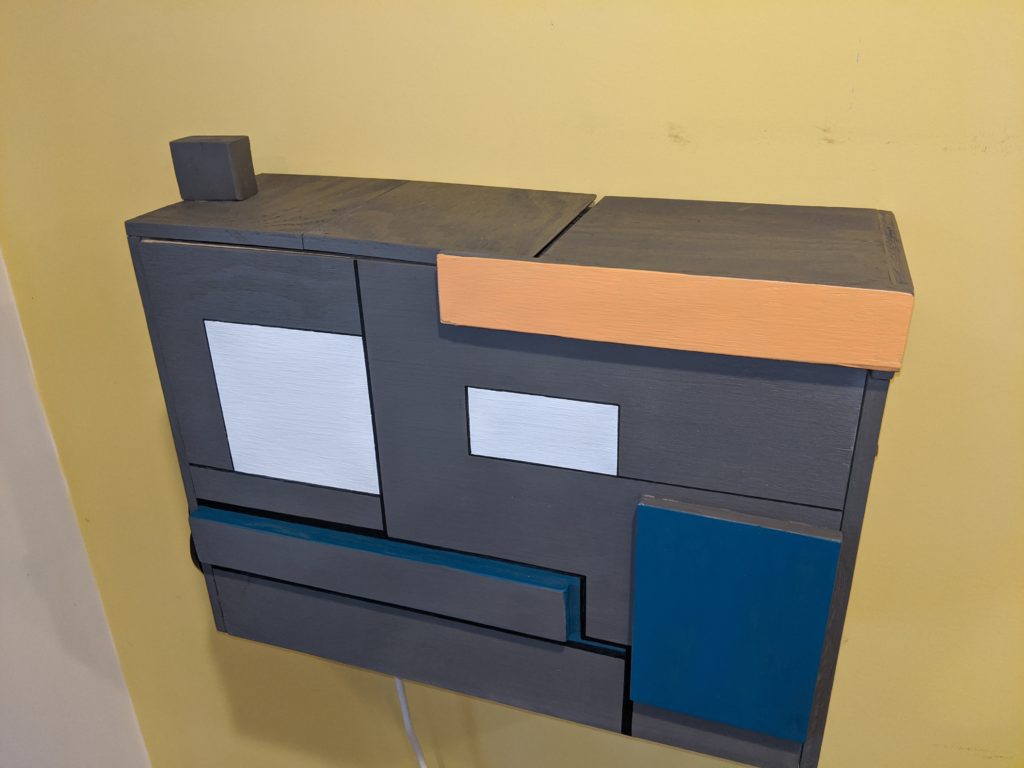
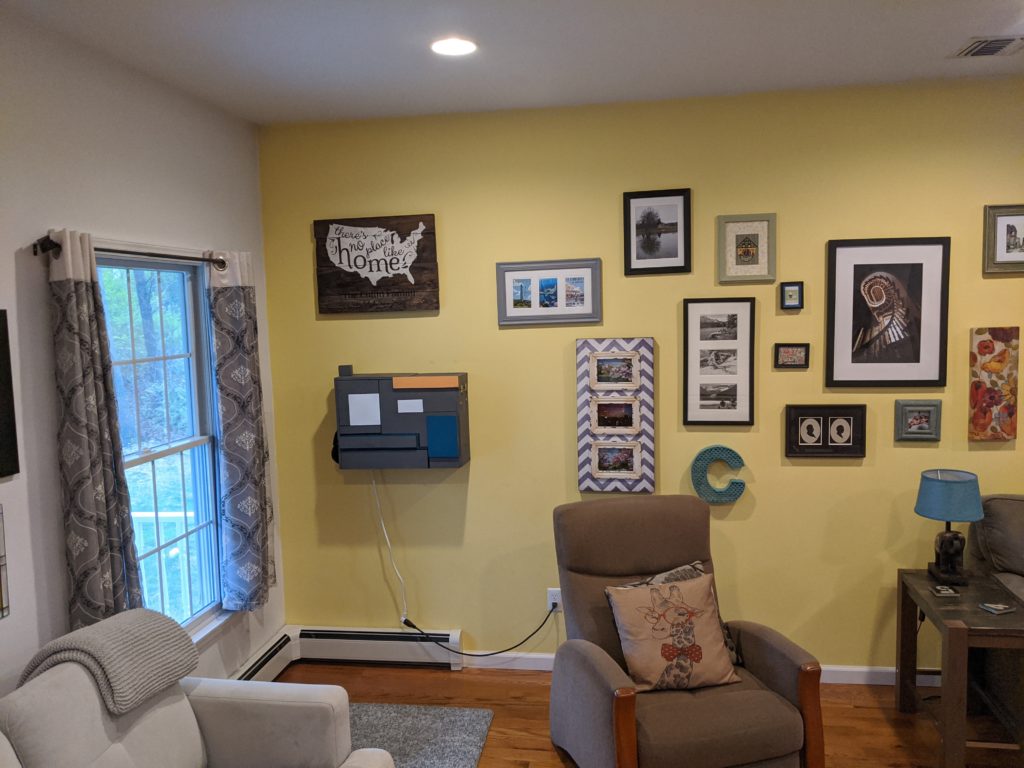
I’ve been using it for a couple months and I love it. Here’s how it looks when I’m not in work mode:
My first iteration was simple: a basic cabinet with a folding front, and a top slot to let me access wiring & storage behind the monitor:
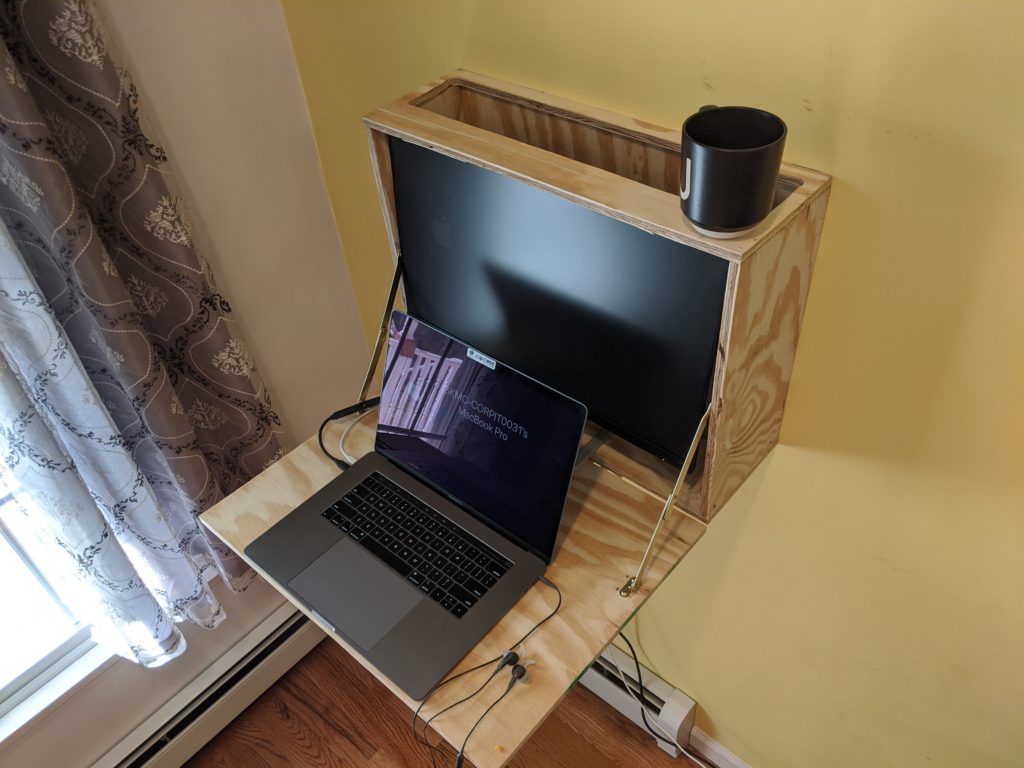
I got that all glued up and let it dry on a Sunday, and then hung it on the wall and started work Monday morning. I immediately realized a big flaw. In my zeal to make it as small as possible, I didn’t account for the angle from my eyes down to the monitor. After only a few minutes of trying to use it, I gave up, got my jigsaw, and sawed the cabinet top off.
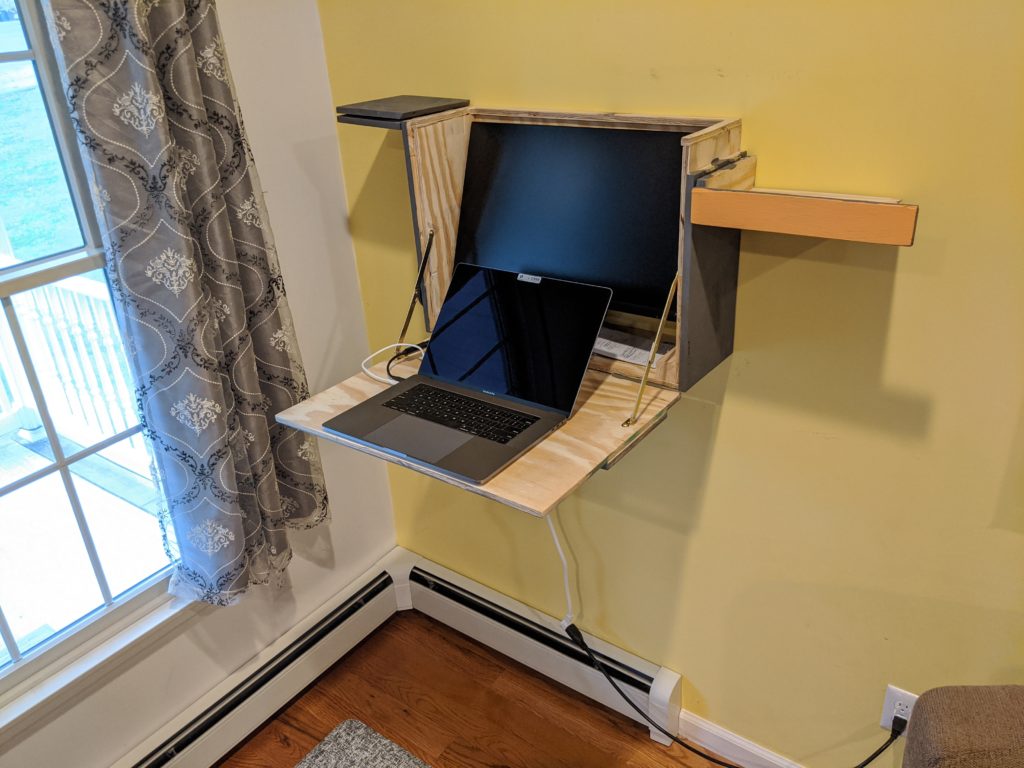
That made it workable for the first week, and gave me a few days to ponder how to replace the top. By the time the next weekend rolled around, I had come up with my vision of a hinged folding lid that doubled as shelves, and was excited to take it down and get to work. Here’s a view of the left side and the accessory hooks. You can see that the awkward block of wood on top has a purpose: it’s the support for the opened shelf. (It would probably look nicer if I’d attached the block to the cabinet instead of the shelf, but I didn’t think of that at the time.)
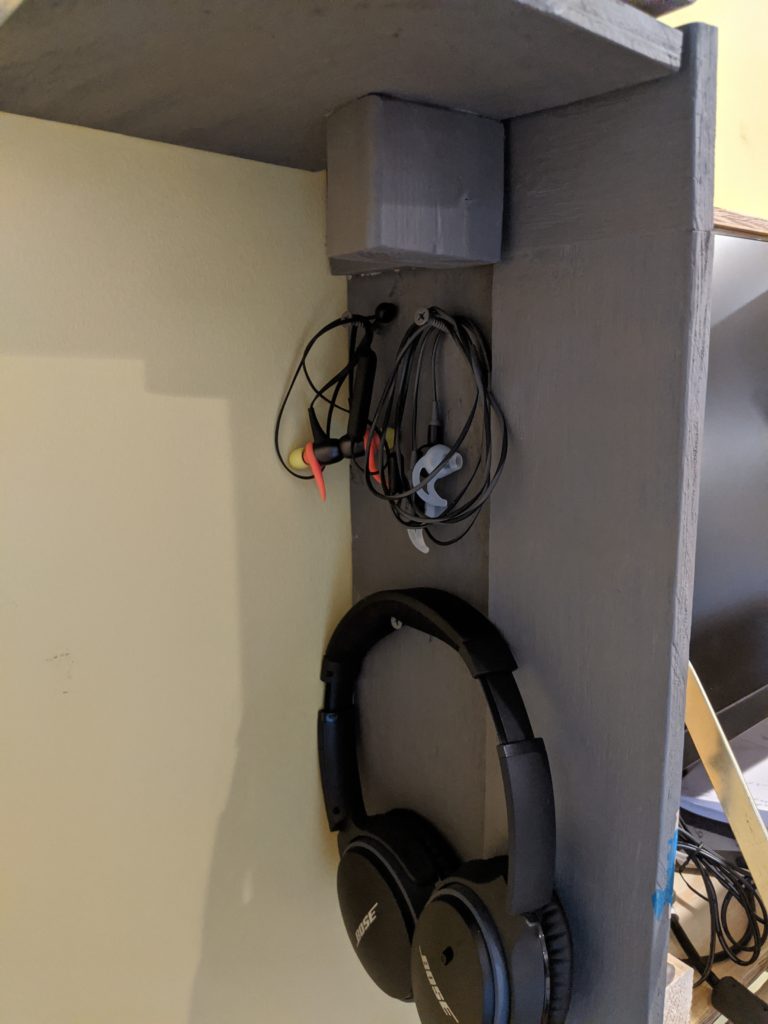
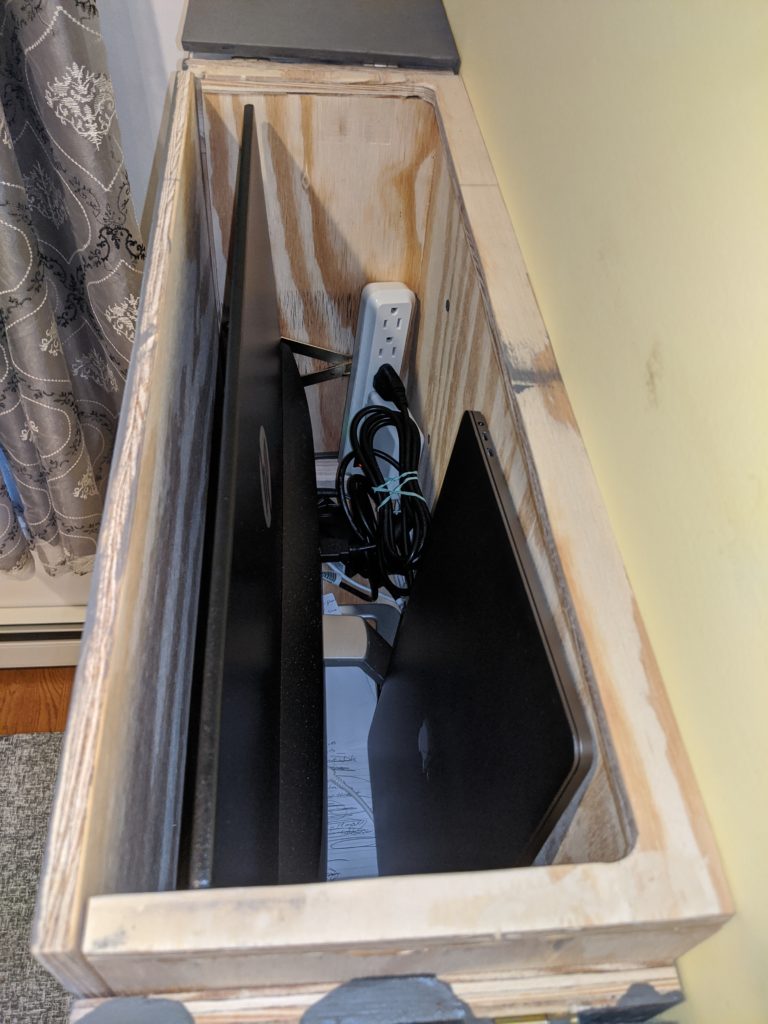
The behind-monitor storage has worked out well. I slide my work laptop and my personal laptop in on the right side, and the left side has plenty of room for wires and a power strip. I tilt the monitor back when I’m working, and forward when I need to get behind it.
I initially planned on staining it a natural color, and maybe stenciling a geometric design on the front. But when I attached the hinges, the screws were too long and poked out. Not wanting to make a needless Home Depot trip during the early covid-19 stay-at-home days, I decided on a whim that I would cover the screws up with random blocks of wood and work them into the final design. If I were to do that over, I’d make sure the blocks were square, instead of just grabbing them from my scrap bin as-is. My wanna-be Mondrian paint job was all the harder because of the out-of-square blocks.
One last thing I would have liked to do: move the outlet on the wall. That’s pretty easy, but I don’t have any leftover paint from this room. The dangling cords don’t bother me enough to escalate a diy-desk project into a repaint-the-living-room project.
Here are a couple more photos and some build notes, in case you’re trying to refine your own design or build something like it yourself.
It’s attached to wall studs with 4 long-ish drywall screws, just like you might use when hanging a kitchen cabinet. The inner layer of plywood was the original cabinet. I added the outer layer to the right side as a shelf support, and to the left side for symmetry. The little blocks in the bottom corners were from when I was experimenting with fastening the sides of the cabinets. I started with trim-head screws but they were splitting the plywood. I used those blocks to sink the screws into. (Turns out they make nice little shelves.) Ultimately I switched to my air nailer. I really don’t think it mattered much, as the glue & clamps did the real work.